Teacher’s Day is a special day to give recognition to all the people who have come across our path to inform, change and pave a path for our future. While it is much easier to purchase something at a store, nothing comes from the heart as a handmade product. If you’ve ever wondered how to make a Teacher’s Day card, this guide will walk you through the process in the simplest way possible. The best part? You don’t need fancy materials: just creativity, love, and a few things already lying around at home.
Why a Handmade Card Means So Much
Teachers often receive many gifts, but when you take the time to make something on your own, it carries a unique value. A card may seem simple, but it shows effort and thoughtfulness. It becomes more than just paper; it’s an emotional keepsake. Unlike any store-bought teacher’s day gift, a handmade card has the power to touch the heart instantly.
Step 1: Gather Your Materials
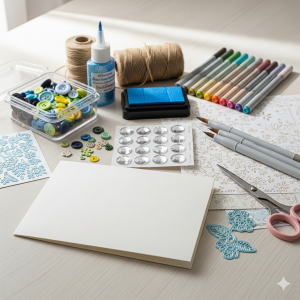
Before you begin, get the basics ready. Here’s what you may need:Chart paper or thick craft paper
- Sketch pens, markers, or crayons
- Glue, scissors, and tape
- Glitter, stickers, or small decorative items
- Old photographs, dried flowers, or magazine cut-outs (optional)
Remember, when learning how to make a Teacher’s Day card, you don’t need to buy anything fancy. Even recycled paper and everyday stationery can help you make something beautiful.
Step 2: Decide the Theme of the Card

Think about your teacher and what they mean to you. Do they always encourage you with kindness? Or do they inspire you with discipline and wisdom? Once you know the emotion, decide the theme: funny, emotional, colourful, or simple.
For example:
- A bright, cheerful card for a teacher who makes learning fun.
- A simple, elegant design for a teacher who values discipline and order.
The theme will help you decide on colours, decoration, and even what message to write inside.
Step 3: Create the Base

Fold your paper in half to create the card shape. If you want something unique, cut the paper into a heart shape or book shape before folding. Stick to neat edges; clean folds and cuts make the card look polished, even if it’s handmade.
Step 4: Add Decorative Elements
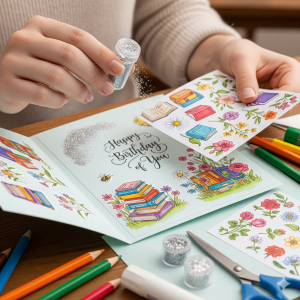
This is where creativity shines! Here are a few ideas:
- Draw flowers, books, or chalkboards to give it a school vibe.
- Paste a small photo of your class with the teacher for a personal touch.
- Use glitter pens to outline borders or make stars.
Add pressed flowers if you want a natural look.
If you’ve also been thinking about a gift for a teacher, you could attach a small handmade bookmark inside the card. This adds extra charm without spending much. You can make your handmade Teacher’s Day card even more special by pairing it with a thoughtful gift from FNP.
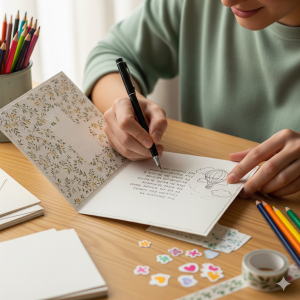
Step 5: Write a Thoughtful Message

The heart of your card lies in the words. Be honest and write what you truly feel. You don’t have to be poetic. Here are some prompts:
- “Thank you for making learning so joyful every day.”
- “Your guidance has shaped me into who I am.”
- “You are more than a teacher; you are an inspiration.”
Remember, the words you write will be treasured more than the decorations. A card is not just a simple gift for teacher; it is an emotional token of gratitude.
Step 6: Personalize the Inside
You can add fun elements inside the card:
- A small poem or quote about teachers.
- A doodle of your classroom.
A list of things you’ve learned from your teacher.
If you are making more than one card, you can also adapt the idea for different occasions. For example, with slight changes, the same steps can be used to create a gift for mom on Mother’s Day or one for father’s on Father’s Day. Handmade love always works across relationships!
Step 7: Add the Finishing Touches
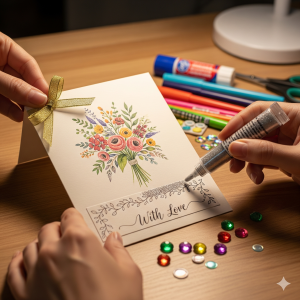
Look at your card as a whole. Does it feel complete? Sometimes, even small additions like a ribbon on the side, a handwritten border, or a sprinkle of glitter can make a big difference. Make sure the glue has dried before you hand it over.
Why Handmade Cards Are the Best Gifts
In today’s fast-paced world, handmade efforts stand out. A card may not cost much, but it creates an emotional connection. Whether it’s a gift for a teacher, a gift for mothers, or even a gift for father, handmade items always speak louder than store-bought presents. They tell the recipient that you invested your time and energy just for them.
Conclusion
Learning how to make a Teacher’s Day card is not about craft skills; it’s about expressing gratitude in the simplest way possible. A teacher shapes minds and builds futures, and what better way to thank them than with a heartfelt creation of your own? So, this Teacher’s Day, pick up some paper, colours, and glue. Pour in your emotions, add your personal touch, and surprise your teacher with something they’ll never forget. Your card may fade with time, but the feeling behind it will remain forever.